Learning to use open source and other free graphic softwares available to apply them to digital scrapbooking.
My Blog List
Pretty Decorative Element for Scrapbooking
This is a different version of our previous tutorial which was so much fun and has been so popular!
Open up Inkscape.
Choose the ellipse or circle tool and Make a oval (770.196 w x 1359.67) or any size you like, hold down the Ctrl key as you make the shape so that it will have a perfect form. Make sure that it is vertical.
Choose a color from the palette at the bottom of the page, I will choose a nice happy lime green because that matches a photo I will be using it in. Click on the oval to fill it with the color. Now right click on stroke at the bottom palette toward the left of the page, and when the menu appears, click on the “X” to choose no stroke.
Now click on the Text tool and type anywhere on the working area the capital letter V. You can choose any font you want. I picked ZapfHumnst Ult BT and for the font size I chose 144.
Click on the letter to make it the same color as your oval, now click on the 10th icon on the top of your page, (the second one underneath the word Text), to make sure that your letter "V" on top of your oval. Now click on the letter so that the arrows will appear all around it and stretch it a bit to make it larger. Now, click on the “V” again to select it, and click for a second time, little arrows will appear that indicate you can rotate the letter,
Grab one of the corner arrows and rotate the letter so that the “V” is upside down, that is how we need it for our decoration.
Click on the letter and put right above your oval (that will make it easier to group them), now, while the arrows that select the "V" are still active, hold the shift key down and click on the oval. That will select both objects at the same time.
When they are both selected, go to Extensions, Generate from Path, Scatter. Click on the first two boxes, then click on Cloned, and then choose apply. Wait till it applies and now you see that you have an oval with an open scalloped edge. Click on the oval and while it is selected, go to Object, Ungroup. Then click on the open scallops, and go to Object, Ungroup. Now you see all the small “Vs” around the oval. Now, holding the shift key down, stroke with your mouse to select all of the objects (the oval and the little circles must fit into the selection), then go to Object, Group. Now you can move the whole thing around, because it has become one object and it won’t fall apart when you move it.
Now go to File, Export Bitmap and export as a PNG file.
I like my images to be smooth, so I took my scalloped oval to Gimp and applied a simple blur. If you want to add a drop shadow, add it by adding a layer, then going to ScriptFu and add Drop Shadow. Then saved it again.
Done!
Bible Universe
How to Make a Scalloped Oval Digi Scrapbooking Element in Inkscape
This tutorial assumes that you have both Inkscape and Gimp installed on your computer, and that you have followed at least some of our previous tutorials to
get an idea of how the free software works.
Open up Inkscape.
Choose the ellipse or circle tool and Make a oval (770.196 w x 1359.67) or any size you like, hold down the ctrl key as you make the shape so that it will have a perfect form. Make sure that it is vertical.
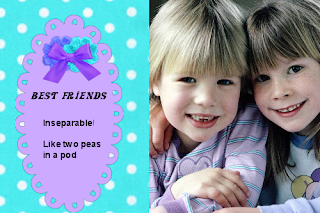
Choose a color from the palette at the bottom of the page, I will choose a pale purple because that matches a photo I will be using it in. Click on the oval to fill it with the color. Now right click on stroke at the bottom palette toward the left of the page, and when the menu appears, click on the “X” to choose no stroke.
Now click on the Text tool and type anywhere on the working area the capital letter O. You can choose any font you want. I picked Rockwell Extra Bold and for the font size I chose 144.
Click on the letter to make it the same color as your oval, now click on the 10th icon on the top of your page, (the second one underneath the word Text), to make sure that your letter "O" on top of your oval. Now click on the letter so that the arrows will appear all around it and stretch it a bit to make it larger.
Click on the letter and put right above your oval (that will make it easier to group them), now, while the arrows that select the "O" are still active, hold the shift key down and click on the oval. That will select both objects at the same time.
When they are both selected, go to Extensions, Generate from Path, Scatter. Click on the first two boxes, then click on Cloned, and then choose apply. Wait till it applies and now you see that you have an oval with an open scalloped edge. Click on the oval and while it is selected, go to Object, Ungroup. Then click on the open scallops, and go to Object, Ungroup. Now you see all the small “Os” around the oval. Now, holding the shift key down, stroke with your mouse to select all of the objects (the oval and the little circles must fit into the selection), then go to Object, Group. Now you can move the whole thing around, because it has become one object and it won’t fall apart when you move it.
Now go to File, Export Bitmap and export as a PNG file.
I like my images to be smooth, so I took my scalloped oval to Gimp and applied a simple blur.
Then saved it again.
You're done!
Now use in your image as I have done.
Bible Universe
How to make a scrapbooking tag in Inkscape
This tutorial assumes that you have at least a little bit of knowledge of this software and that you already have it installed in your computer. Inkscape is a free, readily available software that you can download from the internet.
Please, check out our previous tutorials to get some understanding of how the software works.
Fire up Inkscape.
Choose a color, I picked a peachy beige from the palette at the bottom of the page. Turn off stroke.
Click on the rectangle tool. And while holding down the shift key, draw a rectangle with rounded corners.
Make it with the following dimensions:
W: 1291.42
H: 708.571
Now click on the Ellipse or Circle tool. While holding the shift key down so that your circle will be even, draw a small circle.
Fill it with the same color as you picked for the rectangle and turn the stroke color off. Click on the arrow select tool and then on the circle
and move it so that it will be in the middle of the top of the label. Center it well.
Now click on the circle to select it, now holding the shift key down, click also on the label to select both objects, go to Object, Group, to turn them
into a single object. You can stop right there if you want and you will have a simple label that you can use.
You can leave it like that, or you can a apply any SVG texture you like. There are many free SVG textures online which you can download. Or you can open Gimp,
copy the tag that you have made in Inkscape, and paste it in Gimp and fill the tag with any pattern of your liking using the Bucket Tool in Gimp.
You can also apply some of the powerful Inkscape filters to your image. I will show you only two. Oilslick and Tartan. Only to give you an idea of what you can do. This will give you a glimpse of the possibilities.
Experiment until you get a label that you like!
............
Bible Universe
Labels:
free tutorial,
gimp,
how to make a scrapbooking tag,
inkscape
Subscribe to:
Posts (Atom)