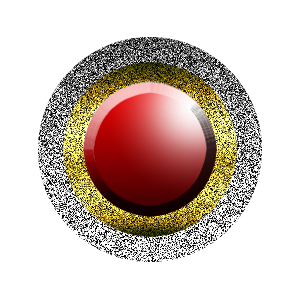
Open up Gimp.
Make a new image 300 x 300 px.
Choose the Ellipse tool and make a selection.
Position: 38 x 37
Size: 224 x 225
Change the Foreground color to #4f4f4f and leave the Background color as White. Now, selecting the Blend or gradient tool, fill in the selection with a Linear gradient by stroking downward
with your mouse, going from dark to light.
Go to Layer, New layer, named it "glitter1".
Go to Filters, Noise, RGB Noise. Uncheck Independent RGB, and select Correlated Noie. Move all the levers all the way up to 1.00, and click OK.
Go to Layer, New Layer, name it "glitter 2."
Go to Select, Shrink and shrink the selection by 25 px.
Go to the gradient tool again and choose Golden.
Fill the new selection with another Linear gradient.
Go to Filters, Noise, RGB Noise. Move all the levers to 0.60, click OK.
Now go to Layer, new Layer, name it "center". Go to Select, Shrink and shrink it by 20 px.
Change the Foreground color to ##fb0000 and the Background color to #340204
Go to the Gradient menu and select Adaptive Supersampling, and also RG to BG (RGB) gradient and fill int he selection with the new
gradient.
Change the Foreground color to White, go to Brush, and select the Circle Fuz
 zy 19 brush, and click on the upper right side of the center once to give it a nice shine.
Go to Script-Fu, Bevel and Emboss, and choose Inner Bevel, depth: 15, direction Up, sie: 10 and leave the rest as is. Click OK.
Go to Layer, new layer, then to Script-fu Drop Shadow.
Then go to Layer, Merge down, then go to Select, None.
Save your Button as a PNG image.
.................
No comments:
Post a Comment