Learning to use open source and other free graphic softwares available to apply them to digital scrapbooking.
My Blog List
New Sculpted Badge for Your Blog, Store or Website
This tutorial assumes that you have already gone through our last tutorial and learned the basics of Fill and Stoke in Inkscape. Please, take a look at previous tutorials here to be able to prepare for this one. You must have Inkscape and Gimp installed in your computer to be able to make this badge. You can get them for free!
This one has a 3D kind of quality to it and it just as easy as the previous one.
Open Inkscape. Choose a color (I picked a medium pink, but follow your own taste), click on the ellipse or circle tool and while
holding the Ctrl button down, make a circle of a size you like. Click on the stroke at the left side of the bottom of the page.
Choose Edit Stoke and change the color of the stoke to red (or a darker color for you) choose a decorative stoke you want and apply it.
Make a smaller circle also holding the ctrl key so that it will come out perfectly round. Fill it with a darker shade of the previous color,
and change the stroke to white and to a different stroke paint. Apply.
Now Export your file as a bitmap (a PNG) take it to Gimp.
Open up Gimp. Open your file. Now Go to Script-Fu, Bevel and Emboss.
For your style choose Inner Bevel.
Depth: 20
Direction: Up
Size: 15
Highlight color: White
Shadow color:black
and leave the rest as is.
Click Ok and wait for it to apply the bevel.
This will give your badge that almost geometric edge that it has.
Go to Layers, Merge down.
Then save as, select file type by extension and pick PNG.
Now go back to Inkscape.
Open the badge.
Choose star, select a darker pink for the Fill and a light pink for the Stroke, and do not choose a dotted stroke, but a straight line stroke.
For your star's corners, choose 30, spoke ratio: 0.752, leave rest as is.
Center your star in the middle.
Now click on the text tool and write anything you want.
Go to Edit, Copy and Paste, to reproduce the text. Change the second bit of text to white.
Click on the black arrow and move the white text on top of the black one. Now click on the canvas to deselect and click on the arrow again.
Select all the text and to to Object, Group. Now click on the text and move it to the center of your badge.
Export as Bitmap again.
Done!
..............
The Hand of Trust
Striking Badge or Sticker for Your Blog or Store in Inkscape
Continuing with our tutorials on how to make attention-getting sticker or badges, this one is very simple to make but it captures the eyes of a browser, which is what you want.
If you do not have Inkscape, download the software, it is free.
Open Inskcape. Go to File, New, Default. Once you have your working area, select the ellipse or circle tool.
Holding the Ctrl key down, draw a circle with the ellipse or circle tool. Fill it with the color Red form the palette at the bottom of the page. Make this circle bigger than you think you will need it for your text. Now click the arrow tool and then click at the top of the page where it says Affect: Make sure the first two symbols there are selected. At the bottom of the page, to the left side you will see two lines of color, one says Fill, the other Stoke. Now, right click on the Stroke.
A little menu will appear, choose Edit Stroke and let the next little menu open. Go to Stroke Paint. Choose White as your color and make sure you select the solid color that is beside the X.
Choose the solid color that is next to the X. Then, go to Wheel and pick the white. Now go to Stroke Style.
Choose the following Options:
Stroke style
Width: 40.000 px
From the little menu, choose Dashes (the style will be the little lines) and 7.00 on the little menu beside Dashes leave rest as is
Now click somewhere on the canvas so that your changes will apply.
Holding the Ctrl key down, make a circle with the ellipse tool that is quite a bit smaller than the first circle. Click a darker red in the palette at the bottom of the page to fill your circle.
Now we want to decorate the edges of this circle like we did with our last one. So right click on the stroke at the bottom of the page and go into Edit Stroke, then Stroke Paint.
Choose the solid color that is next to the X. Then, go to Wheel and pick the white. Now go to Stroke Style.
Choose the following Options:
Width 20.00
Dashes (but for the style this time choose the dots) and on the little menu beside the dashes selection choose 6.40 Now click somewhere on the canvas to see how your
selections apply. Now, move the smaller circle to be inside the larger one. center it well. Click on the arrow tool and draw a selection that will cover both circles. Go to Object, Group. Now you have joined your two circles into one object
With Black, write the words Great Buys! then select the font
Paperback, size 144
Click on the arrow tool and copy the text, paste elsewhere on the canvas. Change it to white by clicking on the color at the bottom palette.
Now, the text will be impossible to see but you can still see the selection where it is contained. click on it and move it so that it will be
on top of the black text, just barely showing the black text. Now click on the canvas to deselect, and choosing the arrow tool again, draw a selection
that covers the text. Then go object, Group. Now your text is one group and you can move it safely.
Move it so that it is inside the inner circle of the badge.
Go to File Export Bitmap and choose a name for it and a place to put it and it will export as a PNG file with a transparent background, ready to be used!
This is another version of the same badge with different settings for the dashes and a different font and message. I also added a little drop shadow to it. Play with the different setting until you get an effect you like!
..........
A Courageous Attitude
How to Make a Badge For Your Blog or Store
This is a very simple project that will add a little bit of interest to your blog or website. You can use it in your store to call attention to certain things you want your visitors or customers to notice. We will start with the simplest of badges. It is a combo badge created in Inkscape and Gimp.
Go to Inkscape
Click on the color of your choice. Then choose the Star shape. At the top of your page you will see a list of options.
Write the following:
Corners: 52
Spoke ratio: 0.884
Rounded: 0.050
Leave randomized alone.
Select and copy, then close Inkscape.
Open Gimp.
Paste your Inkscape image.
Make sure your Foreground Color is Black. Choose the Text tool and find the font you like most. I chose Rockwell, a font that
comes with Gimp, and I gave it a size 30. Now, click in the center of the badge and write whatever you want to say.
Once you are done, go to Script-Fu and choose Drop shadow and add a drop shadow to your text. Save as a PNG image.
That is all that is to it!
..........
A Courageous Attitude. . .
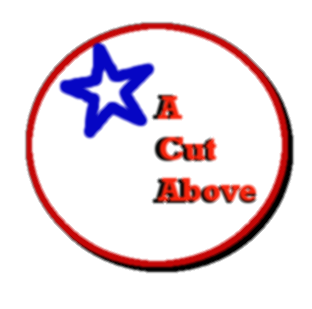
How to Make a Cute Round Sticker in Gimp for Your Site or Scrapbooking
Fire up Gimp.
Create a new image, any size you like, mine is 640 x 400. Click on Advanced options and choose Transparent. Click OK.
Pick the Ellipse tool. Draw a circle.
Position 193 x 70
Size 262 x 244
Fixed Aspect ratio
Make sure Antialiasing is checked
Choose White as your Foreground color (#ffffff) and clicking on the bucket tool, fill the selection.
Now change the Foregound color to a nice red (#c40606)
Go to Select, Border, choose 5 pixels and click OK.
You will see a marching ants border, with the bucket tool, click inside that border and the color will be applied. If you
want it a bit thicker, click again. If you want to, add a drop shadow to your sticker, by going Filters, Light and Shadow,
Drop Shadow.
Go to Select and choose None.
Now go to Filters, Render GFig.
Once the menu opens, change the color of the stroke by clicking on it. We will choose a nice blue #0606c4, click OK.
Now in the GFig menu, choose Star (at the top of the menu), increase the sides to 5 and working in the image that appears in the
same GFig menu, make the star inside the sticker. Click close.
Go to Filters, Blut, Gaussian Blur and blur by 3.
Now change your Foreground color to Black or to #050606. Choose the text tool, select the font Rockwell Bold, size 35.
Click inside your stamp and write the words: A Cut Above.
Go to Layer, New Layer.
To make the text a bit fancier, change your Foreground color to #f6240d. Go to the text tool again but reduce the Rockwell Bold to 34.
Click on top of the letter A and begin writing the text again. With the mouse, move the selection into place so that it almost covers the black
letters, leaving a bit to be seen as a shadow.
Go to Filters, Blur, Gaussian Blur. Save as a PNG.
Experiment with your own colors and if you want, insert a small dingbat into your stamp. Give it color. Write a message on it. Have fun!
..........................
The Key to the Storehouse
Subscribe to:
Posts (Atom)