
Fire up Inkscape.
Choose the Polygon tool. At the top of your page there will appear two options, a pentagon or a star. Just write 5 corners, and you will get the
 pentagon. Choose a color from the palette at the bottom of your page and draw your pentagon. Now go to Path, Object to Path. Then click on
the nodes tool, which is directly underneath the black little arrow at the top of the sidebar toolbar and add some nodes to your pentagon.
When you are comfortable with how many you have added, just pull the bottom node down to get the pointed bottom of a heart, pinch the center of the
 pentagon to get the center of the heart and "fix" the sides to your liking. Now, while the nodes are still selected, go up to the top of the page and select the
smooth node button, which is the 10th button from the left on the top of the page. This will smooth out the lines on the shape of the heart.
This is the simplest way to get a heart in Inkscape. There are other
ways and we might explore them, but play with this one in the meantime!
If you would like to make your heart fancier, lets work on it a little more.
Click on the heart with the select tool and then go File, Duplicate. Move the duplicate heart to the side. Change the duplicate to a darker color.
Since my main heart is peach, I chose to change the duplicate to a dark brown. Now, while the duplicate is selected, go to the top of the page and click on
the 9th button at the top of the page to Lower Selection One Step, now move the darker heart behind the original heart just enough to create a shadow.
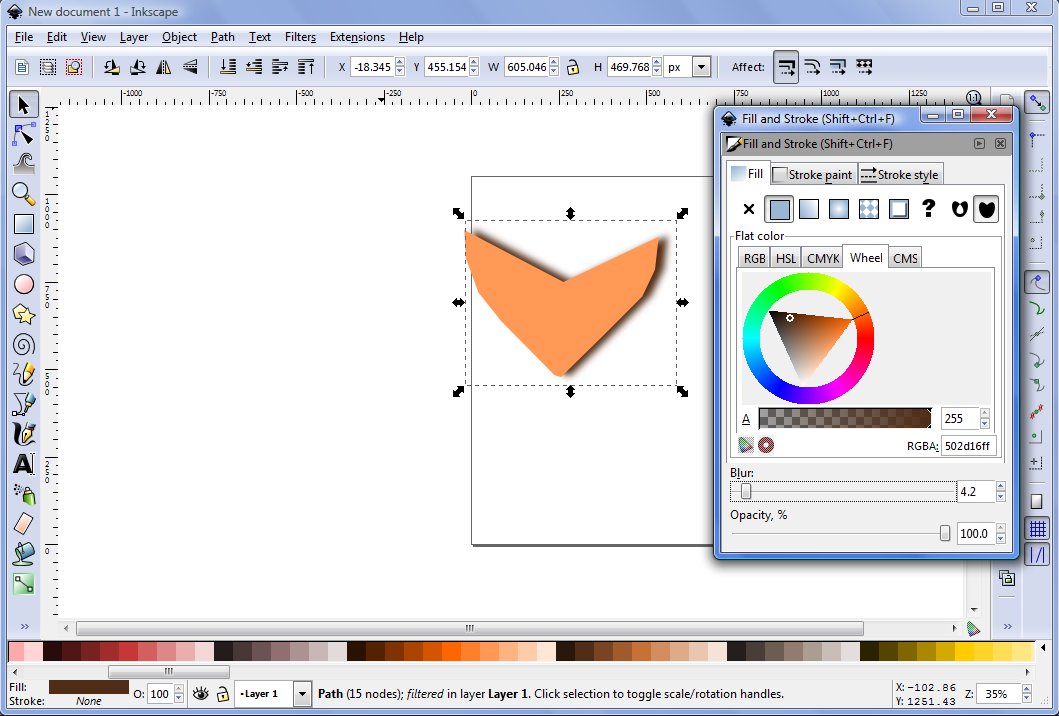 At the bottom of the page, to the left hand corner of the palette, right-click on the Fill, when the little menu opens, choose edit Fill and Stroke. But we will
not be working on the colors, but simply choose a 4.2 blur for the darker heart to turn it into a drop shadow. You can stop right there if you want to, or you
can make your heart a bit fancier still.
If you want it a bit fancier. Click on the first heart (without moving it from where you have it) just to select it, then go to File, duplicate. Now on the palette
below, choose black to change the color of the new duplicate or the darkest color in the palette color of your main heat. I chose a dark, almost black, chocolate.
Now, look at the sidebar. Almost at the buttom, below the bucket fill is the gradient tool. Choose that. And now click on the duplicate you made and stroke with
your mouse upward to create a gradient that will start dark at the bottom point of the heart but as it gets more transparent, it will reveal the original color
you had picked underneath. You can stop there and you have a pretty heart already.

heart on top of the one you had and will make the gradient darker. If you like that effect, you can leave it, but we don't want that, so we will choose a lighter
color than the one the original heart had. Then, we will choose the circle tool, select the color white, take out the stroke color by right-licking on the
stroke space right below the palette, and when the drop down list opens, choose Edit stroke and then, when it takes you to the menu, where you will just click on the
X to deselect the stoke color. Make an oblong white shape that will cover the top of the heart. Now, while the oblong shaped is selected, hold the shift key down and
select the heart. This will select both shapes. Now go up the Path, Intersection. This will cut off part of the color and show what is underneath.

heart and using the left key of your mouse, draw a gradient down. Now go to the Path menu, and go to inset, so that an edge will be created around the lighter part of
the heart. Now select the heart again, and go to Filters, Bevels, Raised Border. Now select the lighter part that we made inside the heart and go to Filters, Bevels,
Deep Colors Plastic. This will give you a fancy heart indeed with very little effort. You can also go to Filters Bevels, Melted Jelly.

Now you can also make the basic heart shape like we did at the beginning. Cut and paste it into Gimp.
Now you can do a number of things. I chose to go to Filters, Gaussian Blur and blur the original to 13 pixels. Then I took the bucket tool and filled the shape with a
pretty pattern. Finally I went to Script-Fu and chose Drop shadow. Merge layers. Save as a Png.
Done!

No comments:
Post a Comment